
Need some help or support?
Hopefully you'll find anything you need below...
List of Services
-
Quick Start GuideList Item 1
This PDF guide includes everything you need to get you quickly up and running with Odin.
The guide also includes all the default passwords and the browser address for the Odin user interface, in case you've forgotten.
-
Odin User ManualList Item 2
Click the link to go to the PDF manual. This can be downloaded and printed locally.
-
Video Tutorials and additional DocsList Item 3
Here you'll find several instructional documents and help videos.
-
Blog ArticlesList Item 4
Here you can find our Blog with additional help articles on your Odin camera.
-
Support FAQs
You've got questions, so here's some answers for you...
Video Tutorials
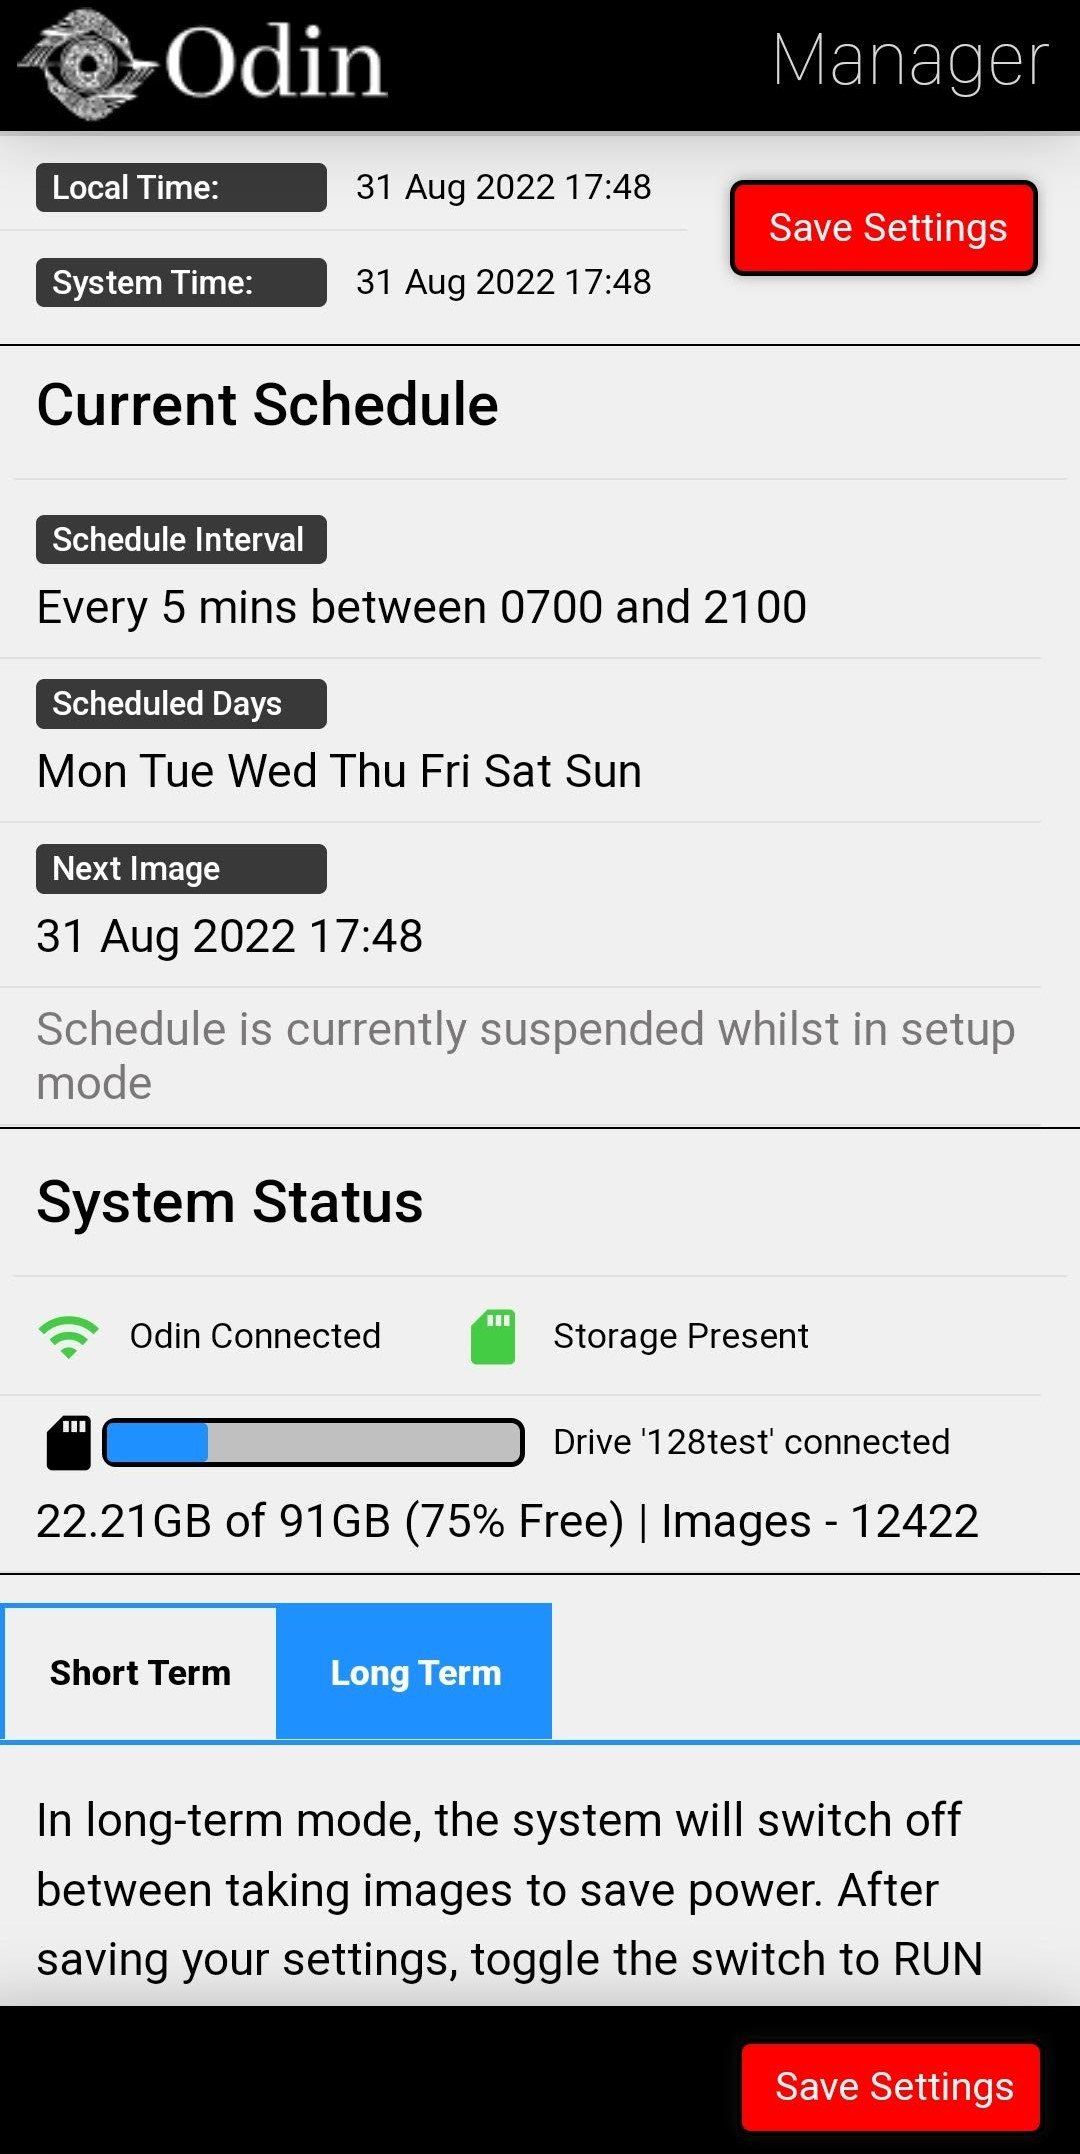
Odin UI Overview Video
A quick overview of the user interface

Instructional Docs


View more